Introduction:
If you’re looking to get the most out of your headphones, upgrading them to balanced headphones can significantly improve the sound quality. While some high-end headphones already come with balanced cables, you can modify any headphones to work as balanced headphones with a few simple steps. Some DACs and Amps like the iFi Zen require balanced output to get the most out of their product.
In this blog post, I’ll show you how I modified my AKG K240 Studio headphones to work as balanced headphones using a 4-pin Mini XLR connector and a balanced cable. I’ll also include circuit diagrams and a video tutorial to guide you through the process. This video and blog were inspired by this blog post here.
Headphones Mod Guide:
Step 1: Gather Your Materials
Before you start the mod, you’ll need to gather a few materials. Here’s what you’ll need:
- A set of headphones that you want to modify
- A 4-pin Mini XLR connector and plug(s)
- Wire strippers and crimpers
- Soldering iron and solder
- Heat shrink tubing
- Balanced cable (or you can make your own you will need a 4.4mm jack and cable).
Step 2: Remove the Old Cable and Connector
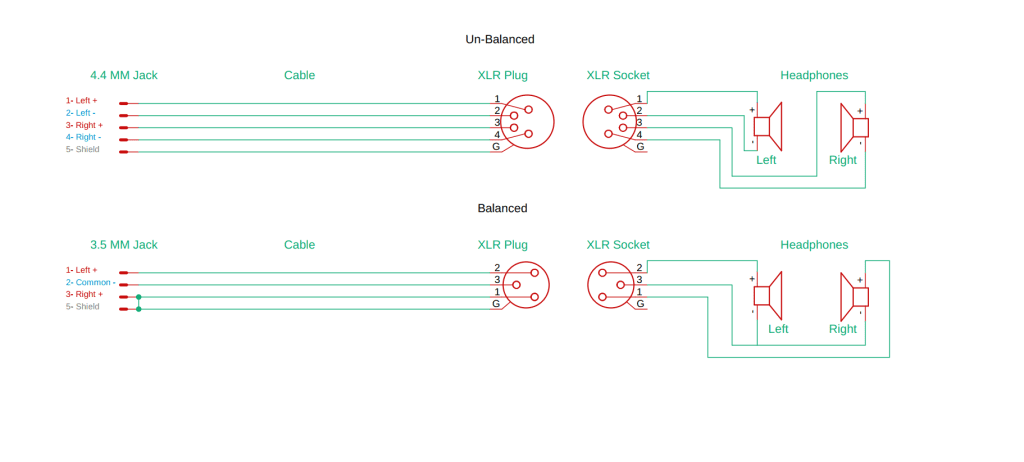
The first step is to remove the old cable and connector from your headphones. In my case, I had to remove the 3-pin Mini XLR connector from my AKG K240 Studio headphones. Use a soldering iron to melt the old solder and remove the connector. Make sure to note which wire goes to which pin.
Step 3: Install the 4-pin Mini XLR Connector
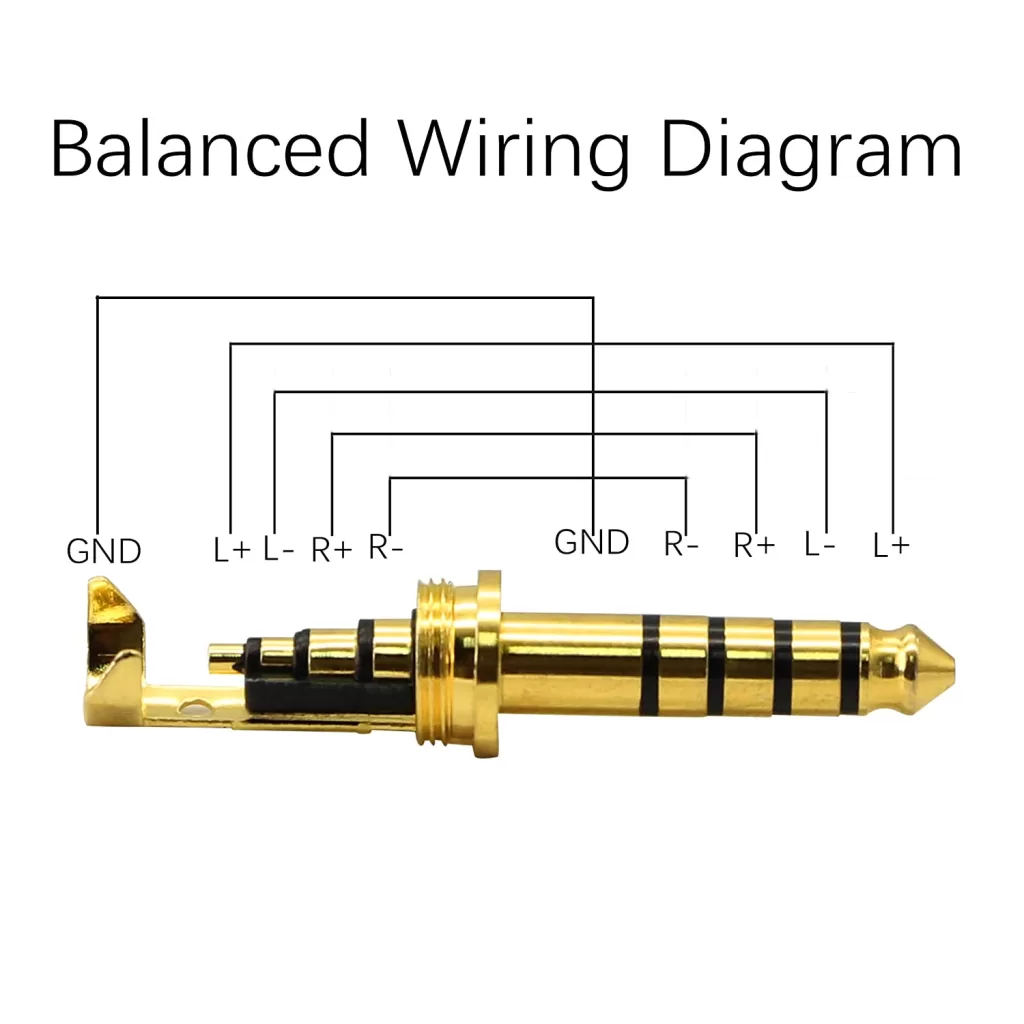
Once you’ve removed the old connector, it’s time to install the new 4-pin Mini XLR connector. The 4-pin Mini XLR has four pins (L+, L-, R+, R-) that correspond to the left and right channels. Wire each pin to the corresponding speaker on your headphones. Use wire strippers and crimpers to attach the wires to the pins.

Step 4: Make the Balanced Cable
The next step is to make the balanced cable. You can buy a pre-made balanced cable or make your own. To make your own, you’ll need a cable with four wires and a shield. Strip the ends of the wires and attach them to the pins on the 4-pin Mini XLR connector and 4.4mm Jack.
Step 5: Modify the Old Cable (Optional)
If you ever need to use your headphones unbalanced, you can modify the old cable to work with the 4-pin Mini XLR connector. Cut the old cable near the old connector and strip the ends of the wires. Attach one wire to the L+ pin and the other wire to the R+ pin. Use heat shrink tubing to secure the connections.
Conclusion:
Modifying your headphones to work as balanced headphones is a great way to improve the sound quality of your headphones. With a 4-pin Mini XLR connector and a balanced cable, you can easily upgrade any headphones to work as balanced headphones. I hope this blog post and video tutorial have helped you understand how to modify your headphones and enjoy the benefits of balanced headphones.